Django user registration: Sample django-registration templates and demo code using Bootstrap 3.
Psst!
Hey you.
Yes, you there, looking at the screen with a combination of confusion, surprise and frustration. Is this the first time you’re trying to create a Django website with user sign up and log in capabilities? Looking for a “built-in” way to do that?
Well, there isn’t one. Sometimes implementing common website functionality that you’d think should be easy and straightforward isn’t so much. But hey, that’s pretty much always going to be the case with any web framework. Though as always, be sure to keep in mind that despite moments of confusion or frustration with the Django learning curve, at least it’s not PHP. So there’s that.
So yes, Django has user authentication built in, and you get a nice admin interface for free if you want it, but none of that is going to help you much with user sign up, as such. You’ll either have to roll your own solution on top of the bits Django does provide, or use one of many external packages, each with their unique combination of advantages and disadvantages.
The closest thing to a “standard” way to provide user sign up is django-registration. This only does local sign up (i.e. based on username/email). If you want log in via social media accounts, that’s a whole other thing.
But if all you need/want is local sign up, django-registration will get the job done. After a bit of fiddling. Including creating your own templates.
UPDATE: Since this post was written, django-registration went through a period where it was not maintained and seemingly abandoned, which led to the creation of a fork called django-registration-redux. AFAIK both are now maintained and compatible with recent versions of Django. I have no advice to offer as to which is preferable theses days, or whether other alternatives entirely are best considered.
Keep in mind user sign up is something where there isn’t likely to be one-size-fits-all approach that will work for everyone. Different websites are likely to want different approaches, hence the different possible registration backends django-registration provides. Then there’s front end differences. Not just appearance, but also differences in front-end frameworks, and any specific django template libraries used within the project.
So this post isn’t intended to be authoritative, or an opinion as to best practices — just a starting point. Because having at least some working sample code is often useful when starting out.
What follows are some pointers and examples that might be useful for those trying to get their head around the whole process of integrating django-registration, and creating the required templates.
Required Templates
The official documentation does a pretty good job of walking through the steps necessary to install and configure django-registration.
As it points out, django-registration requires these templates:
- registration_form.html
- registration_complete.html
- activate.html
- activation_complete.html
- activation_email_subject.txt
- activation_email.txt
The above templates cover functionality provided by django-registration.
However, in addition to the above, most non-trivial websites would want to implement their own templates for things like login, logout and password resets. This functionality is provided by Django’s built-in user authentication system. The authentication views make use of the following templates (by default):
- login.html
- logout.html
- password_change_form.html
- password_change_done.html
- password_reset_form.html
- password_reset_email.html
- password_reset_subject.txt
- password_reset_done.html
- password_reset_confirm.html
- password_reset_complete.html
Example django-registration Templates
Here are some simple examples of the templates django-registration requires, using Bootstrap 3 with the django-bootstrap3 template library.
The complete code is on github.
Templates need to be placed in a subdirectory called registration somewhere where the template loader can find it. (Configure TEMPLATE_DIRS in your settings file as appropriate.)
The following examples assume the default backend is being used, with the default URLs.
registration_form.html
This is the template for the sign up screen. It will contain the registration form for the user to fill out.
You will also mostly likely need to provide a link to URL of the registration view somewhere in your website — for example, a “register” or “sign up” button on the home page. With the default backend the view class is registration.backends.default.views.RegistrationView, and the URL is named registration_register.
So a “Register” button on the home page will look something like this, in the home page template:
<a class="btn btn-lg btn-primary"
   href="{% url 'registration_register' %}">Register</a>
When the user clicks this link, the registration_form.html will be displayed.
A form context is passed to registration_form.html, which it will need to render. For the default backend, this will be an instance of registration.forms.RegistrationForm.
{% extends "base.html" %}
{% load bootstrap3 %}

{% block title %}Registration{% endblock %}

{% block content %}
<div class="container">
  <div class="row">
    <div class="col-sm-offset-2 col-sm-10">
      <h1>Sign up</h1>
      <p>Already registered?
        <a href="{% url 'django.contrib.auth.views.login' %}">Sign in here.</a></p>
    </div>
  </div>

  <form action="{% url 'registration_register' %}"
        method="post" role="form" class="form-horizontal">
    {% csrf_token %}
    {% bootstrap_form form layout='horizontal' %}
    {% buttons %}
    <div class="col-sm-offset-2 col-sm-10">
      <button type="submit" class="btn btn-primary">
        {% bootstrap_icon "star" %} Sign Me Up!
      </button>
    </div>
    {% endbuttons %}
  </form>
</div>
{% endblock %}
registration_complete.html
Confirmation to the user that registration has completed successfully.
{% extends "base.html" %}

{% block title %}Registration complete{% endblock %}

{% block content %}
<div class="container">
  <div class="row">
    <div class="col-md-8">
      <h1>Registration complete!</h1>

      <p>An activation email has been sent.</p>
    </div>
  </div>
</div>
{% endblock %}
activate.html
Displayed if account activation fails. The activation_key context is provided to display the failed activation key used.
{% extends "base.html" %}

{% block title %}Account activation error{% endblock %}

{% block content %}
<div class="container">
  <div class="row">
    <h1>Account activation error</h1>
    <div class="alert alert-danger col-md-9">
      <p>The activation key <strong>{{ activation_key }}</strong> is invalid or expired.</p>
    </div>
  </div>
</div>

{% endblock %}
activation_complete.html
Confirmation to the user that registration has completed successfully.
{% extends "base.html" %}

{% block title %}Account activation complete{% endblock %}

{% block content %}
<div class="container">
  <h1>Success!</h1>
  <p class="lead">Account successfully activated!</p>
  <p>You can now sign in to the website.</p>

  <p><a href="{% url 'django.contrib.auth.views.login' %}"
        class="btn btn-success"
        role="button">Sign in</a>
  </p>
</div>
{% endblock %}
activation_email_subject.txt
Subject line for the activation email:
{{ site.name }}: Please activate your account.
activation_email.txt
Message body of the activiation email. At the very least will need to display a link to the activation URL, which for the default backend is named registration_activate, passing through the activation key available in the activation_key context. Optionally, you can also include how many days before the activation key will expire:
To activate your account, please visit the following page:

http://{{ site.domain }}{% url 'registration_activate' activation_key %}

This page will expire in {{ expiration_days }} day{{ expiration_days|pluralize }}.
Django 1.6 issues
Note that changes to the auth module introducted in Django 1.6 cause some incompatability with django-registration when it comes to password URLs. Until django-registration is updated you may need to add a workaround to your URLs if you’re providing custom password templates:
url(r'^accounts/', include('registration.backends.default.urls')),
url(r'^password/change/$',
                auth_views.password_change,
                name='password_change'),
url(r'^password/change/done/$',
                auth_views.password_change_done,
                name='password_change_done'),
url(r'^password/reset/$',
                auth_views.password_reset,
                name='password_reset'),
url(r'^accounts/password/reset/done/$',
                auth_views.password_reset_done,
                name='password_reset_done'),
url(r'^password/reset/complete/$',
                auth_views.password_reset_complete,
                name='password_reset_complete'),
url(r'^password/reset/confirm/(?P<uidb64>[0-9A-Za-z_\-]+)/(?P<token>.+)/$',
                auth_views.password_reset_confirm,
                name='password_reset_confirm'),
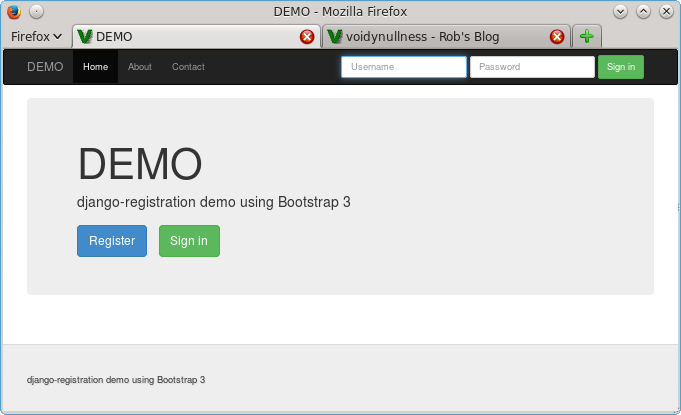
Demo code
The above templates, as well as complete set of Bootstrap-friendly sample registration/authentication templates, are on github. There’s also a simple but functional demo site to show how everything fits together.
Comments